In addition to interactively managing apps and scenarios via the admin panel, this can also be done via a REST API.
Administration
User Management
MIRO Server uses the authentication service of GAMS Engine. To access MIRO Server, a user must satisfy one of the following conditions:
- Have execute permission on the namespace to be used in GAMS Engine.
- Be a member of a user group that has been granted access to an app registered in MIRO.
In other words: Either you are an Engine user with the required execute permission, or you belong to a group that has been assigned to at least one MIRO app.
- User management (inviting users, creating groups, adding users to groups) is done through the GAMS Engine UI.
- App management (adding/removing apps, assigning/removing groups to apps) is done through the MIRO Server Admin Panel.
If you decide to use MIRO Server without authentication (e.g. to showcase applications as in the case of the MIRO Gallery), you need to register one GAMS Engine user, e.g. a user anonymous. Anyone accessing your MIRO apps will then use this GAMS Engine user under the hood for authentication. You will need the credentials of that user in step 6 of the installation. You can also provide the credentials of this user via the `.env` file in the miro_server directory:
| Environment Variable Name | Environment Variable Value | Example |
|---|---|---|
| GMS_MIRO_ENGINE_ANONYMOUS_USER | Username of anonymous user | miro_server_anonymous |
| GMS_MIRO_ENGINE_ANONYMOUS_PWD | Password of anonymous user | t@qHwt%3Mh |
If you do not provide the credentials of the anonymous Engine user, the apps can be launched but not solved/submitted to Engine.
The admin panel
Access
In the Admin panel of MIRO Server you can add new MIRO apps and delete existing ones. Among other things, access to individual apps can also be controlled here via a user group system.
A user with read, write and execute permissions on the namespace that MIRO Server uses will be considered as a MIRO Server administrator. As an administrator, the tab 'Admin Panel' is additionally displayed next to the 'Home' tab:
Tip:

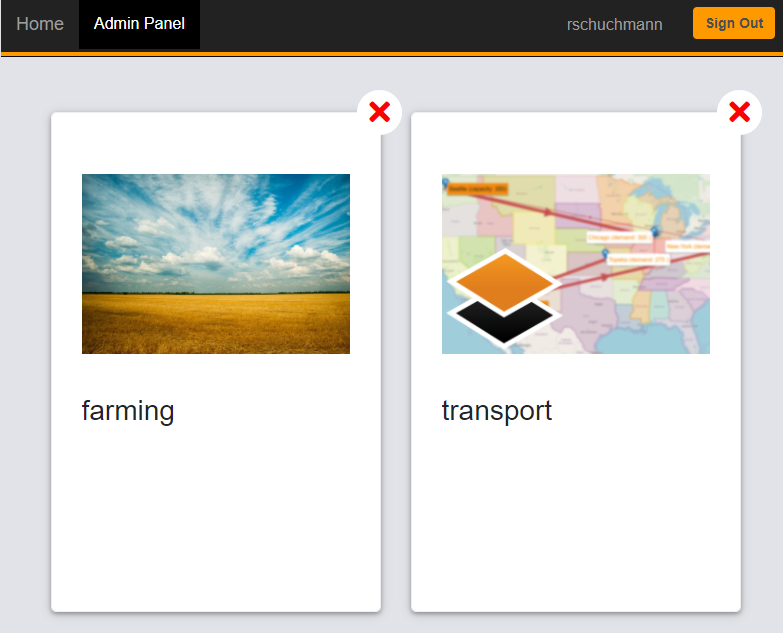
A click on Admin Panel opens a overview with all deployed apps:
When MIRO Server is used without authentication, there is no login screen anymore. Everyone accessing the MIRO Server landing page will end up on the library. Accordingly, there is no longer a distinction between admininistrator and normal user (i.e. there is no admin panel button). In this case you can reach the admin panel via a direct link, just like with MIRO apps. The app id is admin in this case: mydomain.com/app_direct/admin/
Add apps
As with the local MIRO Desktop library, a new MIRO app (miroapp file) can be added easily via drag & drop or by clicking on the last tile:
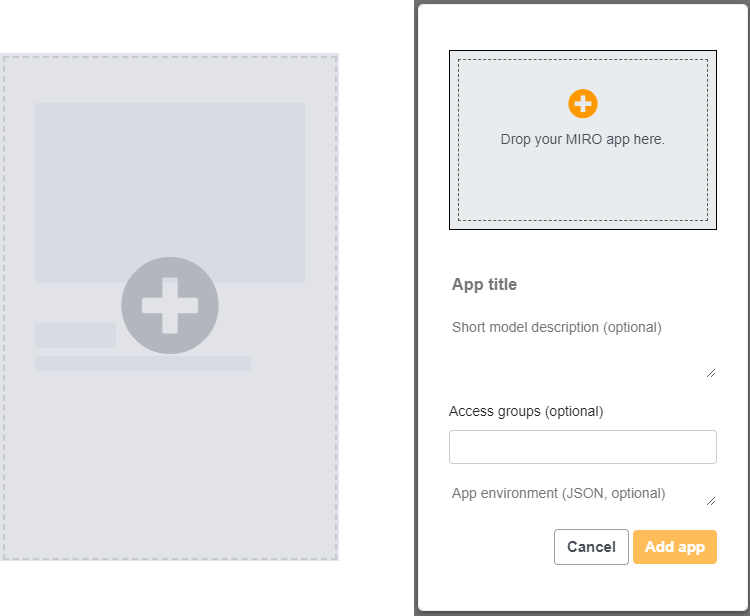
The dialog that opens shows a preview of the deployed app including logo, title and description, which can be modified. Note that the maximum file size for the logo is 1 mb.
Further settings that can be made before adding the app:
-
Access groups (optional):
By default, any Engine user who has access to the namespace used by MIRO Server can see all apps. To limit who is allowed to use the app you want to add, you can optionally assign access groups. A user who is not a member of one (or more) of the assigned access groups does not see the app in the app overview and cannot reach it via direct link (see an example). All GAMS Engine groups of the namespace used by MIRO Server in which the MIRO administrator is a member or has access rights are available for selection. Learn how to create groups and add users in GAMS Engine. -
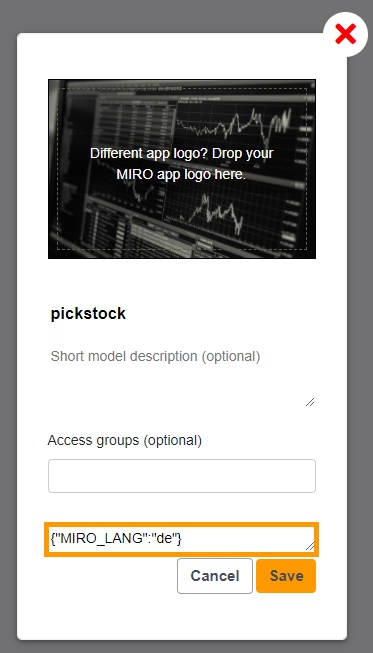
Advanced Settings (optional):
Clicking this button opens a dialog where you can configure advanced options, such as environment variables or default scenario permissions. Environment variables are especially useful if your app includes custom R code, such as custom data connectors or custom renderers, that require secrets like API keys to connect to external systems.
Default scenario permissions specify which users and groups are pre-filled when a new scenario is saved. Users can review and modify these permissions before finalizing the save.
The scenario owner is always included automatically, in addition to any users or groups specified here. If no default users or groups are set (the fields are left empty), only the scenario owner will have read, write, and execute permissions.
Language: While the global language setting applies to all apps, the app environment can be used to change the language of an individual app. This allows the use of apps in different languages within one MIRO Server instance. The environment variable MIRO_LANG specifies the language. Available languages currently are English ('en'), Chinese ('cn') and German ('de').
Color theme: The same applies to color themes. The environment variable MIRO_THEME can be used to overwrite the global color theme of an individual app. Available themes are listed below.
- Default theme (value: "default")
- Black and white ("blackandwhite")
- Green forest ("forest")
- Tawny ("tawny")
- Dark blue ("darkblue")
- Red wine ("redwine")
When all settings are done, add the app by clicking on 'Save'. The app is then validated and added to the library.
Scenario data: All scenarios that are bundled with the app are stored in the MIRO Server database. The user who adds the app will become the scenario owner. All users with access to the app have read and execute permissions for these scenarios.
Edit and remove apps
Edit apps:
You can edit existing apps by clicking on an app tile.
This opens the same dialog as when you add a new app.
Remove apps:
To remove an app, click on the
×
icon in the upper right corner of an app tile. If you
want to keep the database with all the scenario data of
the app you want to delete, you can specify this in the
following step.
Add scenario data
In addition to the possibility of bundling scenario data with an app, scenarios can also be added subsequently by dragging and dropping the data files (gdx, miroscen, xlsx, xlsm, xls, zip) onto the respective app.
The following rules apply:
- Up to 10 scenarios can be added at once.
- Scenarios are assigned to the user who adds them.
- The scenarios are made available (read and execute permissions) to all users who have access to the app.
Access MIRO apps
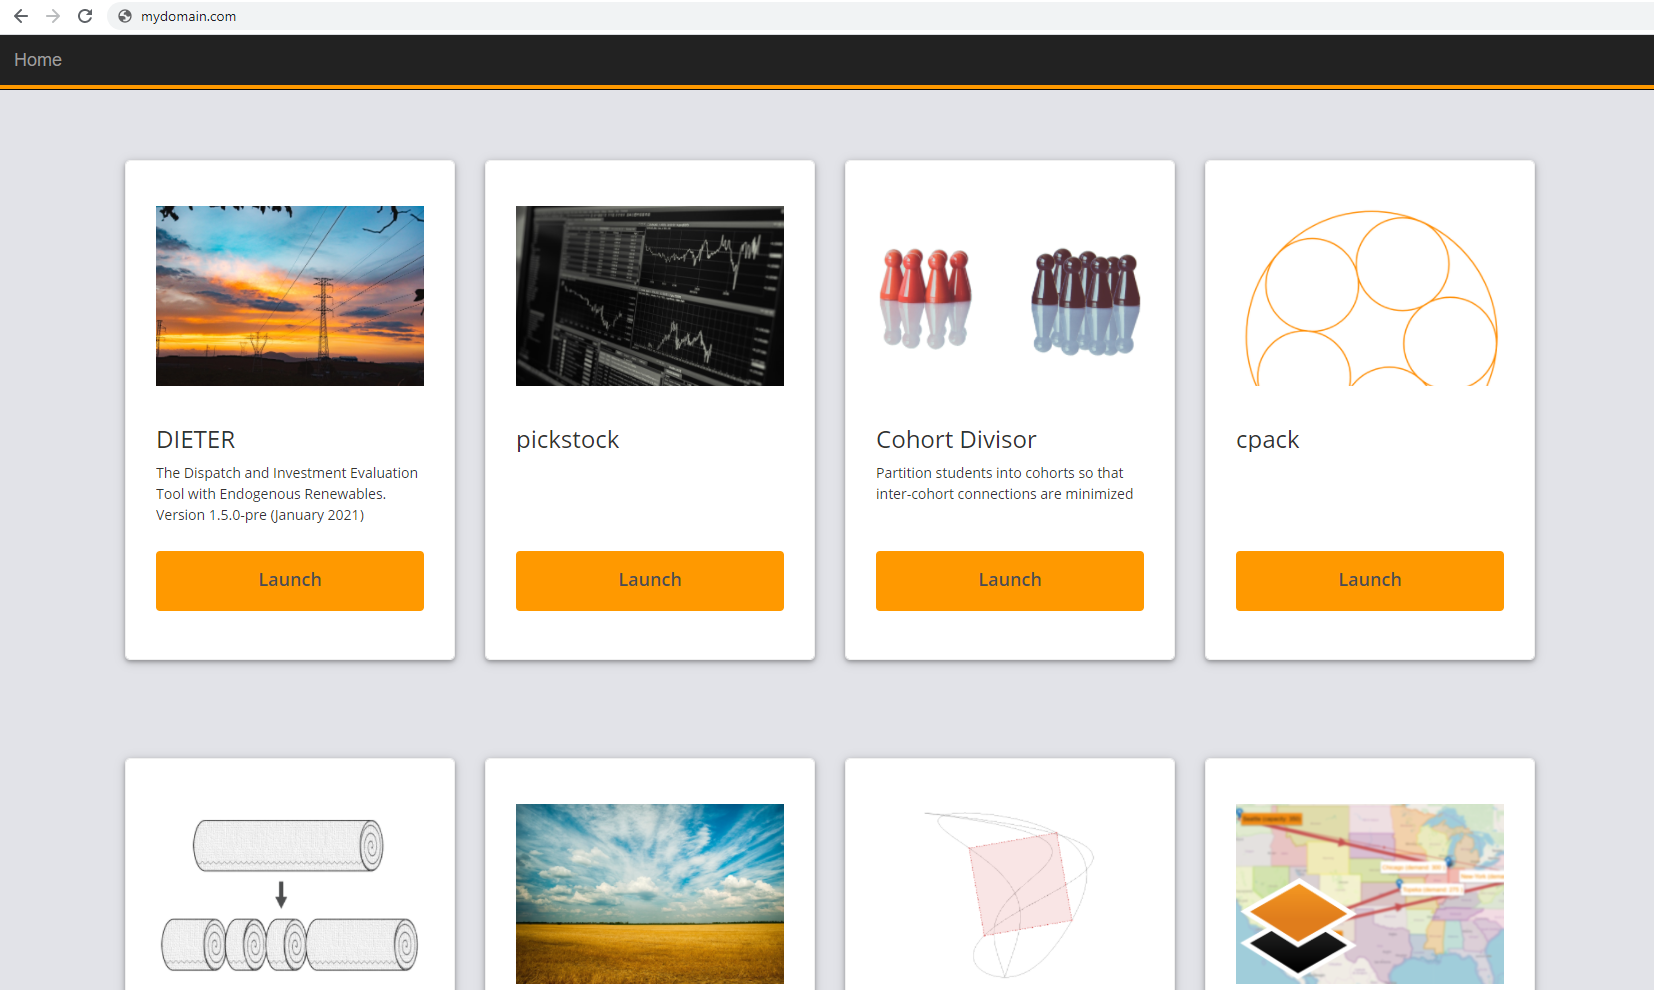
MIRO Server library
The landing page of MIRO Server shows the MIRO Server library. It lists all apps that a user has access to and is very similar to the app library of MIRO Desktop. Each app is displayed in a separate tile and can be launched from there:
Direct links
In addition to the app overview of the MIRO Server library, apps can also be accessed via a direct link. There are two slightly different variants. In both variants the app id is part of the link. By default, this ID is the lowercase name of the main GMS file (without the .gms extension), but it can be customized during app development.
-
<miro_server_url>/app/<app_id> (e.g.
https://miro.gams.com/gallery/app/transport/):
When accessing a MIRO app under this link, the app itself will be available via an iframe. The top of the page contains the navigation bar which brings you back to the landing page of MIRO Server (library). -
<miro_server_url>/app_direct/<app_id> (e.g.
https://miro.gams.com/gallery/app_direct/transport/):
Directly access the MIRO app without the iframe and navigation bar.Info:Within the iframe that is displayed under /app/<app_id>, the /app_direct/<app_id> link is used to display the MIRO app.
Controlling app access
If several MIRO apps are used, it may make sense to make certain apps accessible only to certain users. There are two possible ways to do this.
User Groups
In GAMS Engine users can be assigned to groups (read more about user groups in the GAMS Engine documentation). These groups can be used to control who can see which MIRO app hosted on MIRO Server. In the following example, there are three groups A, B and C. Users in group A have access to 4 apps, users in group B have access to 3 other apps. Group C users can access 2 apps, one of which is also used by another group.
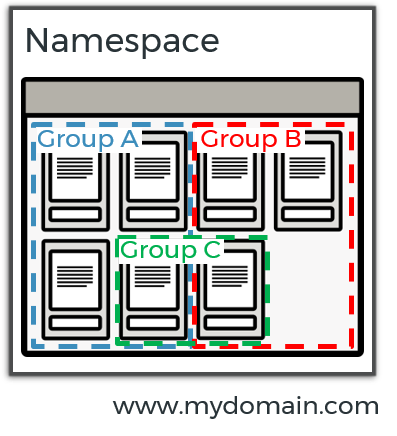
All users access MIRO Server via the same URL. However, as a member of a group, you don't see anything from other apps from other groups.
Tip:
A user can also be a member of multiple groups.
Note:
User groups to be used in MIRO Server must be lowercase. Groups that contain uppercase letters are ignored.
Creating user groups and assigning users to them is done quickly. So it's very easy to control who can access which apps with this approach.
Multiple MIRO Server instances
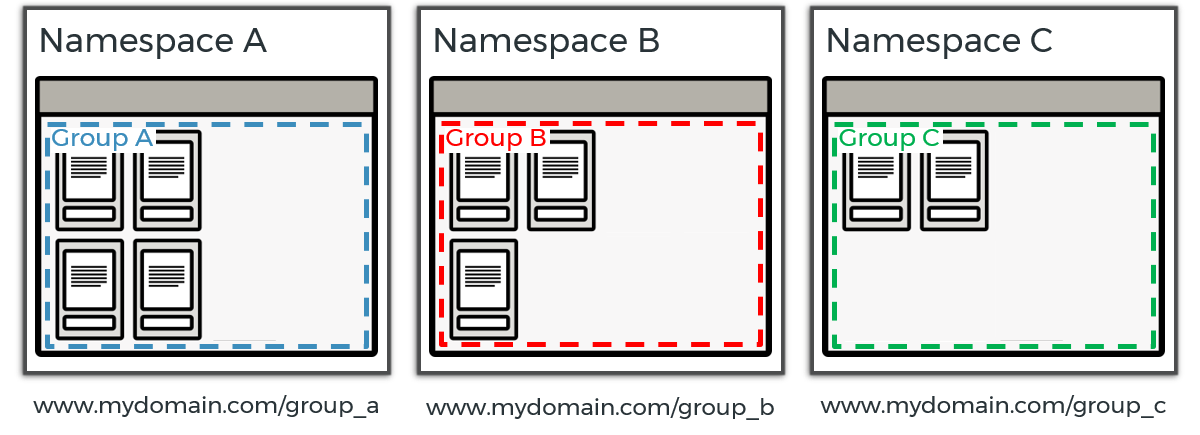
In this approach, users are separated from each other not by groups, but by separate MIRO Server instances. The example setup is as follows: There are 3 different MIRO Server instances, each accessible under a different URL. The MIRO server instances all access the same GAMS Engine instance, but use different namespaces. Using groups is of course still possible, but not necessary in this example.
Note:
Note that in this setup it is not possible to share individual apps with multiple groups. Apps have to be added and maintained separately in each MIRO Server instance. Except that they use the same GAMS Engine, the three instances have nothing to do with each other.